Electronic
rewire
When Agape was being built the electrical requirements and amount of electronics was probably very minimal. My guess would be a couple of 12V pumps, VHF radio, lighting, maybe refrigeration, some outlets and a sparse AC system for charging and power at the dock.
Todays cruising boats carry more and more electronics, requiring larger and larger battery banks, different voltages, and more charging capabilities.

Agape is a power-hungry, Amp Hour eating monster!!!! Over the course of her 32 years on the water, and owner after owner, she's been pieced together bit by bit, and sometimes it's hard to do a proper installation on a cruising boat. You might be in the middle of no where without enough wire, terminals or tools to do a good job, but the job still needs to be done.
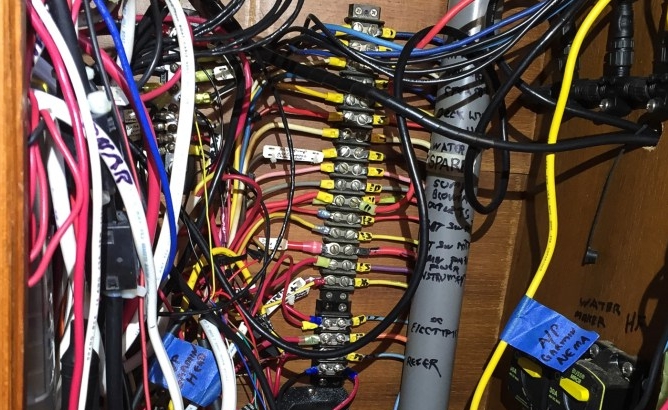
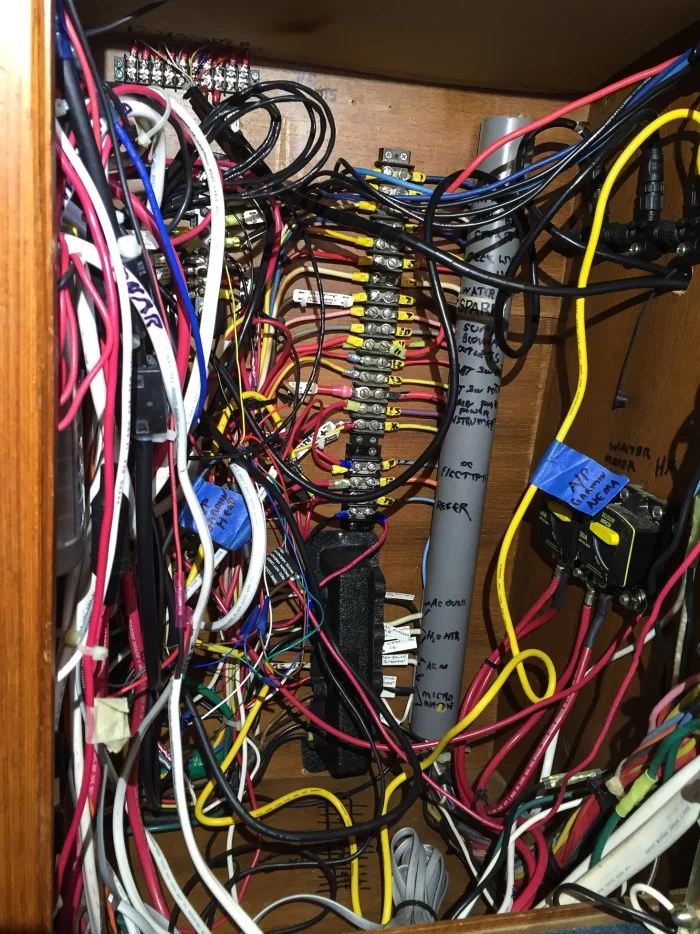
Behind the electrical panel there was a total rat's nest!!!! Burnt, cut, and cracked wires would overload a terminal, or go nowhere at all. The PVC and poor labeling made fault-finding near impossible. So….. We just ended up putting it off and just didn’t open the panel!!!! Everything worked, so we figured don’t fix it, if it ain't broke!!!!
That was until it didn’t all work…. then, it was time. Rachel had to leave town for work for three days and that was the perfect time for me to completely destroy the boat. I really thought that in three days I would be able to rewire the boat. How hard could it be? Not only did I have Nigel Calder's book, Boatowner’s Mechanical and Electrical Manual, but I also had YouTube, and Google!

I started with the 12V and 120V Panel, it was easier just to pull the panel and take the snake of wire into the garage where Bo (our cat), and I could strip it and rewire the whole thing.
Once the Panel was rewired It was time to start pulling out the old wire and running new wire to all the electronics on the boat. Some of it was still good, in fact most of the wire that would be pulled would be reused. As long as it was cut back to expose new bare (tinned) wire I figured why not.
So, then we just had to figure out where to start……
First I disconnected all power at the batteries, disconnected shore power and solar panels before doing anything. Then I just started pulling, ripping it all out. I drew a little diagram and would label where each wire where each started and ended, it's length, the color and it's size. I had hoped that this would make it easier when it came to start pulling the new wire. This ending up taking all three days!!! Sometimes, until eleven o’clock at night when my brain would no longer function. I'm not sure if the wires being previously labeled helped or hurt in this endeavor because half the labels were wrong. When they were labeled I would end up second guessing myself and have to recheck where I pulled it from.

Before rewiring the breakers
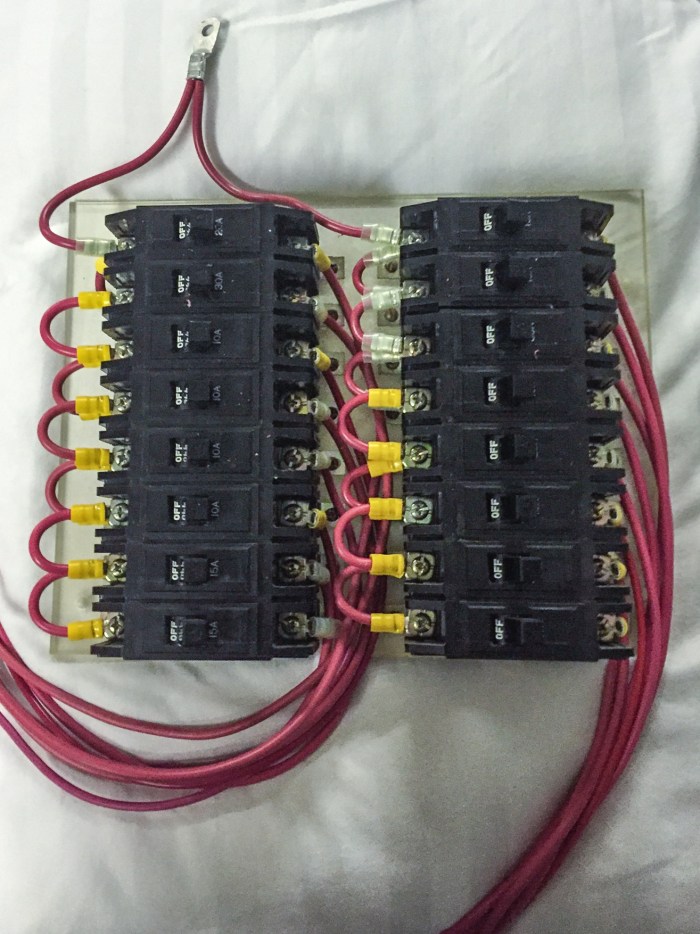
After

Before

After
When Rachel came back to the boat she found it a complete disaster!!!!!

There was progress being made but it was slow, and since we were doing it on a budget, it was even slower. Whenever I needed a piece of wire I would search through the pile to see if I could find the right one. I think our boat would have won an award for most butt connectors found on one wire. It seemed to be a trend that every wire we pulled would have been split off to either power other electronics or just end and be wrapped up and taped behind lockers.
There were definitely times in this project that I doubted my capabilities and thought I was in over my head. Luckily I had my Dad to fall back on for technical support and to bounce ideas off of. I think that Nigel Calder said it best when he said, "Once you have finished rewiring your boat, and truly learned how to do it, you will want to do it again the right way."
Before

During
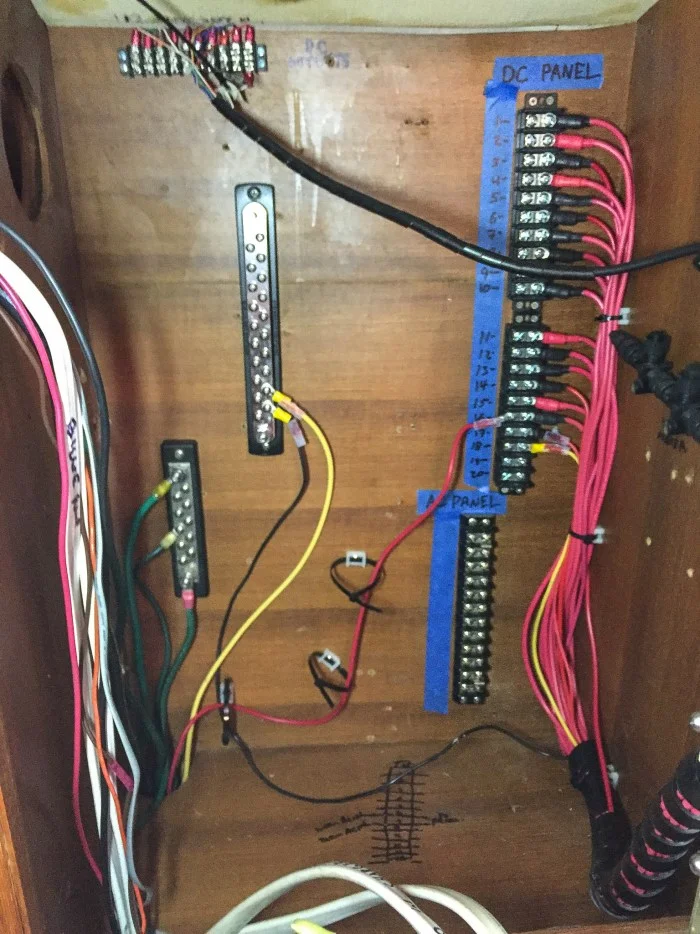
After adding the panel

Almost there
Essentially, you start the project knowing the basics and when your finished you have learned how it should be, and this was true for us. Everything works, everything is up to code and so forth but, if I could do it again I would run the wires to the breaker panel slightly different so that it would look more professional. But heck it's much, much better than before and we have gained invaluable experience. Next time we have an electrical project we can do it with confidence.
One more item checked off the list!!!!
Top 5 things learned during the Project:
Buy full spools of wire!!! You always end up using more that you think and often you can find a 100’ spool online for near the same price as buying 20’ in store.
Adhesive lined heat shrink, and drip loops. A lot of the ends of the wire were corroded, even the tinned wire would be discolored. We are hoping that by adding drip loops (especially in the bilge and where any wires come inside the boat), and sealing the ends that this will help fight corrosion and make for better, longer lasting connections
Professional grade wire stripper and crimper. The little ones that come in basic wiring kits are fine for terminating a wire here and there, but when you are cutting, stripping and crimping hundreds of connections it pays to have good tools.
Get familiar with soldering. Practice on the bigger wires as much as you can because when you get down to the 22AWG tiny little wires it will help. Oh and watch your coffee intake if you are soldering a bunch of stuff, I got a little shaky!!
LABEL EVERYTHING!!!!! Label the beginnings and ends of the wire, and on longer runs label them multiple times along the wire. This will make following the wire so much easier in the future. The wire makes this easier as you can use an indelible marker to write on the outer sheth.
Wire size calculator: make sure that you are not only safe but efficient. http://circuitwizard.bluesea.com/#